
- Click on the Column 1 drop down list. (see figure 1)
- Select the Messenger column you want to appear as the first column on the Quickbooks Export. (see figure 1)
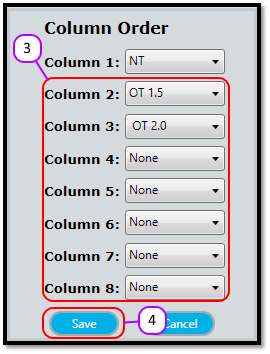
- Repeat steps 1 and 2 for the Columns 2 to 8, choosing “None” if you do not want to include the column on the Quickbooks export. (see figure 2)
- Click the Save
Figure 1
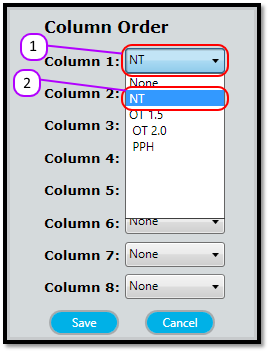
Figure 2
Comments
0 comments
Please sign in to leave a comment.